What kind of tools do UX designers use?
I get asked this all the time by people new to user experience (UX) design. Understandably, they want to learn the tools of the industry so they can get hired.
To celebrate the recent launch of the UI for UX Designers course in collaboration between CareerFoundry and InVision, I’ve put together an answer to this all too common question.
Hiring someone based on the tools they use would be like hiring an artist because they have the right brushes. It’s not about the tools, it’s about method and craft. UX design relies heavily on process and the tools that I use mirror that process.
A design process is a recipe for creating great products. Everyone has their own way of doing it, and everyone uses different tools to make it happen. I’m going to try to share my recipe and the tools that I use along with a few alternatives.
Even better, most of the tools listed here are available on a freemium model and have a usable version for free. The exception is Sketch (good news- there are tons of free alternatives). The only requirement for these tools is a computer or tablet, but with UX design in general, all you really need to create a good user experience is pen, paper, and an inquisitive mind.
There are lots of things that should happen behind the scenes of creating a great product, such as user personas and customer journey maps. I’m just going to assume that you’ve already created these for your business and talk about my workflow from the first stage of inspiration, all the way to implementation of a new product or feature.
Inspiration stage
I know it’s tempting to get on Behance, look for inspiration, and then move straight into wireframes, but as a UX designer, you want to fall in love with the problem, not the solution. You’ll try to define the problem and create a competitive analysis to make sure that you’re solving the right problem in the right landscape. I like to use various survey and polling tools to define this.
Surveys
At CareerFoundry we have a very active student community on Slack so I will often create a Simple Poll in Slack as they’re quick, easy, and garner lots of participation.
For more in-depth surveys, you can use Typeform or other survey tools to reach out to your customer via email. I usually create a survey with a final question that asks whether the customer would be interested in a 30-minute video chat.
Interviews
I take a look at their answers and follow up with a video conference using my favourite video chat tool, Appear.in. Make sure you have a script ready, but more importantly, let the customer lead the conversation in the user interview so that you give them the opportunity to identify problems.
I love the combo of Typeform and Appear.in because all the customer needs to participate is a simple URL so the experience can be as simple as one click with no tools or downloads required.
Problem Solving
Once I have an idea of what the problem is, I use Google Docs to create problem statements and share them with my team for further collaboration.
In addition to understanding the problem, we often use “How Might We” statements, a tool pioneered at IDEO, to frame our approach to the problem.
Project Management
For project management, we use DaPulse at CareerFoundry and it’s great for keeping track of complex projects. I would also recommend Trello for project management, even if it’s just for your own daily work management. It’s an amazing tool and the free version is all you will ever need to manage your UX projects.
Ideation Stage
Now that you’ve built empathy with your customer and wrapped your head around the problem at hand, it’s time to start experimenting. As I mentioned earlier, all you need for this phase is paper and pen, as the goal is to keep things as sketchy as possible until you have experimented enough to discover the solution.
Sketching ideas
When I began sketching ideas, I typically just use standard A4 paper cut in half to create a tablet sized canvas. I always start with mobile and sketch my ideas with a marker so that I won’t get too detailed. Ideally, this is a collaborative process, and I would encourage you to have all of the stakeholders attempt to sketch solutions in a brainstorming meeting along with you.
Whiteboards are excellent for collaborative sketching so I recommend you have several around your office for this purpose. Create several sketches to experiment with (I recommend at least 5 novel directions) checking that each idea is feasible with your stakeholders.
You can scan your sketches into your computer and create a “Preference Test” in Usability Hub if you need help deciding on an approach. You could also use your team’s internal channels like Slack for stakeholder feedback. The important thing at this stage is to allow your team the opportunity for feedback so that you can narrow down the solutions to only those that are achievable.
Wireframes
Once you have a few approaches in sketch form, it’s time to create wireframes. If you already have some design skills, try using Sketch or Illustrator. Vector-based tools like Sketch offer a lot of power, but it can be tempting to jump to high-fidelity designs.
If you find yourself tweaking fonts or adding colour to your designs (a common tendency for UXers with visual backgrounds like myself), switch to a tool that only does wireframing like Balsamiq. I use Sketch for wireframing because it’s faster, but I like to use wireframing kits so that I’m not wasting time creating visuals that serve only to distract. Whether you use a digital tool or even just pen and paper, the important thing is that you stress functionality over aesthetics at this stage.
Prototypes
Experimentation is a pivotal part of any UX designers workflow, and any simulation of what might become the actual product is called a prototype. There is a saying at IDEO that goes, “If a picture is worth a thousand words, then a prototype is worth a thousand meetings.” A good UX designer will spend a lot of time prototyping ideas so make sure that you find a tool that you love.
My favourite prototyping tool is InVision because it covers all the basic functionality in a really intuitive user interface. Of all the prototyping tools I’ve tried, InVision is the fastest way to get something clickable. It’s such a life-saver when you have a user testing session in an hour and your boss is asking you to make changes to the prototype.
They are always adding new features, including a Sketch plugin to prototype in the popular design program. There are a ton of prototyping tools, and most of them are browser-based so all you need is a computer and an internet connection. If you want more in-depth interactions and complex animations, I recommend you buy Flinto for Mac. For on-the-go prototyping, there is even a tool called Prott that allows you to create an entire prototype on your Android or iOS device. Check out uxtools.co for a really nice breakdown of these and other prototyping tools. For offline work and built-in graphics, there’s a free tool for MacOS, Windows, and Linux called Lunacy.
Don’t worry about the learning curve involved with these tools. You can also use paper prototypes to test your idea. It all depends on how real you want the prototype to feel. Once I’ve worked out all of the kinks with my team, it’s time to test these prototypes with real users.
User testing
Designing for the user is fundamental to being a UX designer, and you will want as much face time as possible with your users. At first, getting in touch with your user can seem like a daunting task, but don’t worry, there are a million ways to get access to people for testing.
You can find groups on Facebook that fit with your target market. You can create a print ad and put it up in an area where people are likely to fit your demographic. If you’re feeling brave, you can just walk into any coffee shop in the world and find people willing to try out an idea. Keep it simple and try to offer some sort of compensation for their time. Ideally, you should schedule at least a 30-minute usability test and you should be testing with at least 5 participants.
I really like PowWow for scheduling interviews, and you can schedule up to five on the free trial. If you have more than five interviews to do, I would recommend the paid version or a more powerful tool like Acuity.
You will want to record these interviews if possible and take plenty of notes (I recommend getting a partner for this). Any note-taking program will do, but I recommend using something with a search functionality. I like to use Google Sheets so that I can keep my interview questions and all the responses in one browser tab that is easily searchable.
For recording interviews, I really like Vidyard GoVideo, a really neat Chrome extension that allows you to record the user, the screen, or both in a very simple interface. This works well for testing as it allows you to record the user’s face and the interactions that they have with your clickable prototype. Another alternative would be QuickTime’s screen recording setting (warning: this will create huge files) or even just your phone and a tripod.
CareerFoundry is based in Berlin, but most of our users are in the United States, so we often do remote user testing. The only difference here is that we have the user share their screen while they’re testing the prototype. Offering compensation from across the ocean can be tricky, so we use a tool called Rybbon that offers international gift cards.
Implementation stage
Once you are satisfied with the direction of your idea, it’s time to present your findings to your internal stakeholders. Presenting your work is extremely important for UX designers because many people still don’t understand the process that goes into creating a user-centric product. If they understand all of the steps you went through to get to your final solution, they will be more likely to adopt your approach.
Summarise the testing and pull out your top learnings. Don’t forget to illustrate these with quotes from the testing. I generally use Google Slides for presenting internally because it has excellent commenting and sharing abilities. Sharing your slides afterwards is just as important as presenting your solution! If I want to include more design elements sometimes I will use Keynote as you can drag elements from your wireframes directly from Sketch or Illustrator into Keynote.
Most UX designers won’t get into high-fidelity designs so I’ll keep this phase brief. The UI portion of this process would involve taking your low-fidelity wireframes and turning them into polished designs that are ready for development. I prefer to use Sketch for high-fidelity designs for its ease and simplicity, but some designers still prefer Illustrator or Photoshop or Adobe’s newest design product, Adobe XD.
The important thing to remember about high-fidelity designs is that you clearly present the concept to your development team. One of my favourite tools for this is Zeplin, a program that turns a Sketch or Photoshop file into something that a developer can work with. It pulls out things like hex codes, CSS and fonts allowing them to be previewed through their web app. This is very important because not every developer will have access to Sketch. Use your Zeplin project as the final source of truth between design and development. Having one source of truth will help your developers keep track of the design through the inevitable changes in the development cycle.
In summary
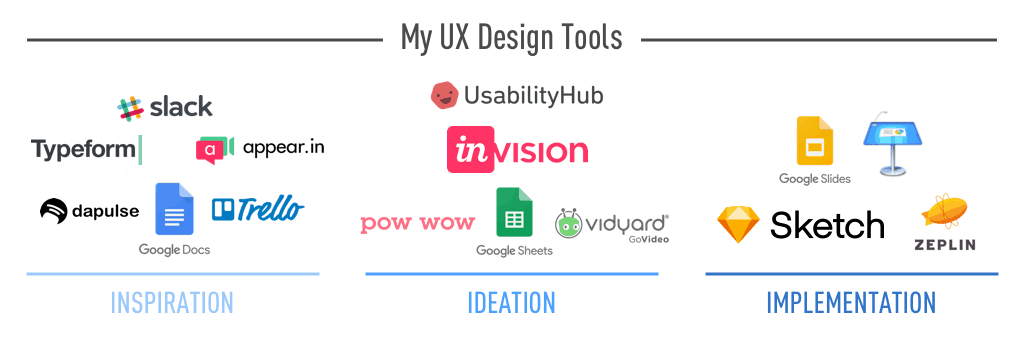
Breaking my process as a UX designer down into three stages, here are the tools I use most often and would recommend.
Inspiration
- Simple Poll in Slack
- Surveys with Typeform
- Interviews using Appear.in
- Google Docs for Problem and How Might We Statement and user stories
- DaPulse or Trello for project management
Ideation
- Pen, Paper, Post-Its
- Get internal buy-in with Usability Hub
- Wireframes in Sketch
- Clickable Prototypes with InVision
- Find participants with Slack, FB, Print Ads
- Scheduling Testing with PowWow
- Take notes in Google Sheets
- Record Interviews with Vidyard GoVideo
Implementation
- Telling the Story with Google Slides
- Sketch for Hi-Fidelity Designs
- Zeplin for Dev Handoff
Bonus tools (a few more of my favourites)
- Chrome
- Trello
- Balsamiq
- Flinto
- Prott
- Acuity
- Rybbon
- Keynote
I hope this has given you a glimpse into the process and tools that go into making a digital product. UX as a discipline is constantly changing and challenging the accepted norms. You should be constantly experimenting with your own tools and process until you find something that works for you. There’s much room for improvement with the current design tools available, so I’m sure our workflows will look very different in just a few short years.
What’s your favourite UX design tool? Leave a comment and let us know!
And if you’re interested in levelling up your UI design skills, take a look at CareerFoundry’s new course: UI for UX Designers.


Great article but Versioning is one big problem between design and development. How do you handle that?
I’m not understanding the question, sorry Sharmilla. Do you mean design can sometimes get out of sync with development releases for software versions?